Creating a Photo Book Without Breaking the Budget
Creating a photo book does not have to become an expensive project. The main costs usually come from book size, page count, paper quality, cover type, and optional design features. By controlling these variables before ordering, you can produce a polished keepsake without putting unnecessary pressure on your budget.
This matters when household finances are already stretched. According to the Office for National Statistics, average UK household expenditure reached £676.60 per week in the financial year ending 2025. That was a 9% nominal increase from the previous year.
Set a Realistic Budget First
Start with a maximum amount you are comfortable spending. Then divide that figure between the book itself and any additional costs.
A simple budget should account for:
- Book format and size
- Number of pages
- Cover material
- Paper finish
- Delivery
- Optional upgrades
A simple way to understand where your money goes is:
| Photo Book Element | Lower-Cost Choice | Higher-Cost Choice | Budget Impact |
|---|---|---|---|
| Book Size | Small or standard size | Large format book | Larger books require more printing material |
| Page Count | Fewer carefully selected pages | Large number of pages | More pages increase printing and binding costs |
| Cover Type | Softcover | Hardcover or premium cover | Premium covers increase production cost |
| Paper Quality | Standard paper finish | Premium or specialty paper | Higher-quality paper increases the final price |
| Design Features | Basic templates | Custom layouts and extra features | Additional design work can increase costs |
| Delivery | Standard shipping | Faster delivery options | Express shipping adds extra expense |
Do not begin by choosing the most elaborate format. Start with the budget and work backwards. This prevents small upgrades from quietly pushing the final price beyond what you planned.
Reduce the Page Count Without Losing Quality
Page count has a direct effect on the amount of material used in production. A 100-page book does not automatically provide twice the value of a 50-page book.
Instead, focus on image selection. Remove near-identical photographs, blurred images, accidental shots, and pictures that add little to the story.
A smaller collection of strong images can create a better book than hundreds of loosely connected photographs.
For example, a travel book could use one opening photograph for each location, followed by a few supporting images. Major moments can receive a full-page or two-page spread. Smaller moments can share a page.
This approach also improves the visual flow of the finished book.
Choose a Practical Book Format
The cover and paper specifications can significantly affect the finished product. If the book is intended as a casual family record, a premium format may not be necessary.
A softcover can be suitable for annual collections, travel memories, children’s projects, and everyday photo books. A hardcover may make more sense for a wedding, anniversary, or family history project that will be handled frequently.
A simple comparison:
| Format | Best For | Advantages | Consideration |
|---|---|---|---|
| Softcover | Annual albums, travel books, everyday memories | More affordable and lightweight | Less durable than hardcover |
| Hardcover | Weddings, anniversaries, family history books | Stronger protection and premium appearance | Higher cost |
| Lay-flat | Professional albums and important events | Allows images to spread across two pages smoothly | Usually one of the most expensive options |
| Premium Paper | High-quality portraits and special projects | Better texture and image presentation | Adds to overall cost |
For example, Mixbook offers softcover, hardcover, and lay-flat formats, along with different paper finishes and book sizes.
If durability is not the main requirement, compare a standard format before upgrading.
Use Templates to Cut Design Time
Designing every page from scratch can make the process longer and more complicated than necessary. Templates provide a consistent structure for image placement, text, spacing, and typography.
This also reduces design mistakes. Poor alignment, inconsistent margins, and overcrowded pages can make a photo book look unfinished.
Tools such as Mixbook Studio allow users to start with customizable themes and then adjust layouts, text, backgrounds, and other elements. Its Auto-Create feature can also arrange uploaded photos into layouts automatically.
If you want more control without starting from a blank page, personalized photo books can be built from templates and then modified to match the project.
Organize Photos Before Uploading
One of the easiest ways to control costs is to organize your images before starting the book.
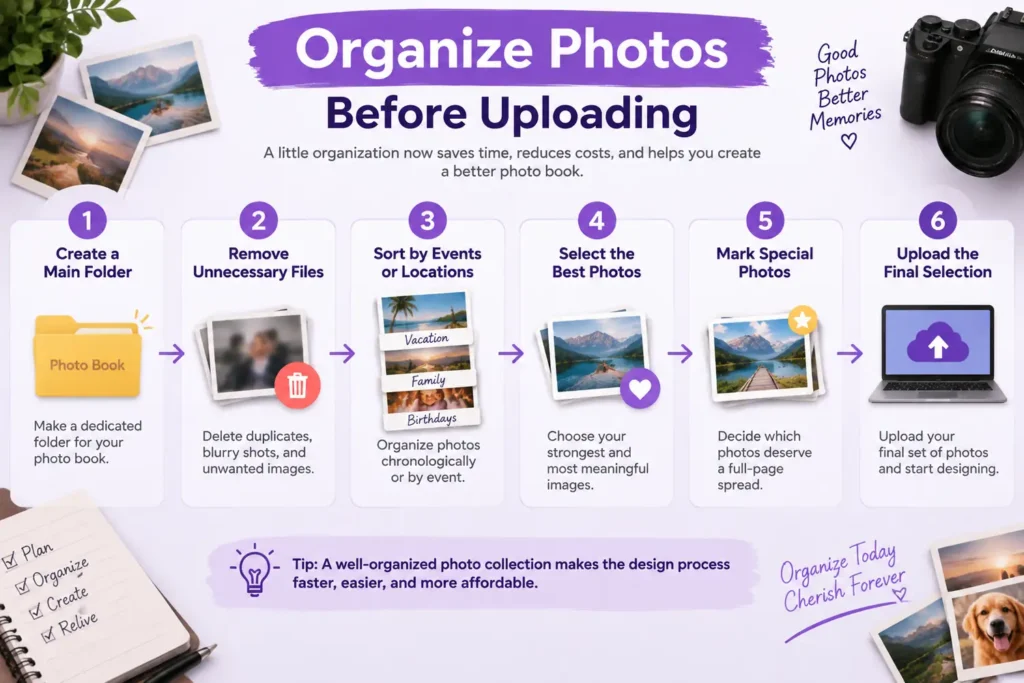
Create a dedicated folder and remove unnecessary files first. Sort photographs chronologically or by event. Rename important files if needed.
A useful workflow is:
- Create the main photo folder.
- Remove duplicates and poor-quality images.
- Separate photos into events or locations.
- Select the strongest images.
- Decide which photographs deserve full-page treatment.
- Upload the final selection.
This avoids repeatedly changing layouts because too many images were selected at the beginning.
Spend More on the Images That Matter
A budget-friendly book does not need every page to have the same visual treatment. Use premium-looking layouts selectively.
A particularly strong portrait might deserve an entire page. A group of smaller photographs can work well in a grid. Captions can provide context without requiring additional photographs.
White space is also useful. Filling every available area with images can make pages feel crowded. A clean page with one strong photograph can often have more visual impact than a collage containing six weaker images.
Check the Book Before Ordering
The final review is where you can prevent expensive mistakes. Check every page at full size.
Look for:
- Cropped faces or important details
- Low-resolution images
- Typographical errors
- Missing captions
- Uneven spacing
- Repeated photographs
- Blank or accidental pages
- Incorrect dates or names
Also check the cover and spine if your chosen format includes one. Make sure the title is positioned correctly and remains readable.
Finally, review the total price before checkout. Compare the cost of your chosen format with a simpler version. If the difference is substantial, decide whether the upgrade actually improves the finished book.
A good photo book is not defined by its page count or premium specifications. Strong image selection, sensible layouts, and careful editing usually have a greater effect on the final result. With a fixed budget and a structured workflow, you can create a personal keepsake that looks considered without spending more than necessary.